Getting Dynamic
These two pages are great and all but where are the actual blog posts in this blog? Let's work on those next.
For the purposes of our tutorial we're going to get our blog posts from a database. Because relational databases are still the workhorses of many complex (and not-so-complex) web applications, we've made SQL access first-class. For Redwood apps, it all starts with the schema.
Creating the Database Schema
We need to decide what data we'll need for a blog post. We'll expand on this at some point, but at a minimum we'll want to start with:
idthe unique identifier for this blog post (all of our database tables will have one of these)titlesomething click-baity like "Top 10 JavaScript Frameworks Named After Trees—You Won't Believe Number 4!"bodythe actual content of the blog postcreatedAta timestamp of when this record was created in the database
We use Prisma to talk to the database. Prisma has another library called Migrate that lets us update the database's schema in a predictable way and snapshot each of those changes. Each change is called a migration and Migrate will create one when we make changes to our schema.
First let's define the data structure for a post in the database. Open up api/db/schema.prisma and add the definition of our Post table (remove any "sample" models that are present in the file, like the UserExample model). Once you're done, the entire schema file should look like:
datasource db {
  provider = "sqlite"
  url      = env("DATABASE_URL")
}

generator client {
  provider      = "prisma-client-js"
  binaryTargets = "native"
}

model Post {
  id        Int      @id @default(autoincrement())
  title     String
  body      String
  createdAt DateTime @default(now())
}
This says that we want a table called Post and it should have:
- An
idcolumn of typeIntlets Prisma know this is the column it should use as the@id(for it to create relationships to other tables) and that the@defaultvalue should be Prisma's specialautoincrement()method letting it know that the DB should set it automatically when new records are created - A
titlefield that will contain aString - A
bodyfield that will contain aString - A
createdAtfield that will be aDateTimeand will@defaulttonow()when we create a new record (so we don't have to set the time manually in our app, the database will do it for us)
For the tutorial we're keeping things simple and using an integer for our ID column. Some apps may want to use a CUID or a UUID, which Prisma supports. In that case you would use String for the datatype instead of Int and use cuid() or uuid() instead of autoincrement():
id String @id @default(cuid())
Integers make for nicer URLs like https://redwoodblog.com/posts/123 instead of https://redwoodblog.com/posts/eebb026c-b661-42fe-93bf-f1a373421a13.
Take a look at the official Prisma documentation for more on ID fields.
Migrations
Now we'll want to snapshot the schema changes as a migration:
yarn rw prisma migrate dev
From now on we'll use the shorter rw alias instead of the full redwood argument.
You'll be prompted to give this migration a name. Something that describes what it does is ideal, so how about "create post" (without the quotes, of course). This is for your own benefit—neither Redwood nor Prisma care about the migration's name, it's just a reference when looking through old migrations and trying to find when you created or modified something specific.
After the command completes you'll see a new subdirectory created under api/db/migrations that has a timestamp and the name you gave the migration. It will contain a single file named migration.sql that contains the SQL necessary to bring the database structure up-to-date with whatever schema.prisma looked like at the time the migration was created. So, you always have a single schema.prisma file that describes what the database structure should look like right now and the migrations trace the history of the changes that took place to get to the current state. It's kind of like version control for your database structure, which can be pretty handy.
In addition to creating the migration file, the above command will also execute the SQL against the database, which "applies" the migration. The final result is a new database table called Post with the fields we defined above.
Prisma Studio
A database is a pretty abstract thing: where's the data? What's it look like? How can I access it without creating a UI in my web app? Prisma provides a tool called Studio which provides a nice web app view into your database:

(Ours won't have any data there yet.) To open Prisma Studio, run the command:
yarn rw prisma studio
A new browser should open to http://localhost:5555 and now you can view and manipulate data in the database directly!

Click on "Post" and you'll see an empty database table. Let's have our app start putting some posts in there!
Creating a Post Editor
We haven't decided on the look and feel of our site yet, but wouldn't it be amazing if we could play around with posts without having to build a bunch of pages that we'll probably throw away once the design team gets back to us? As you can imagine, we wouldn't have thrown around this scenario unless Redwood had a solution!
Let's generate everything we need to perform all the CRUD (Create, Retrieve, Update, Delete) actions on posts so we can not only verify that we've got the right fields in the database, but that it will let us get some sample posts in there so we can start laying out our pages and see real content. Redwood has a generator for just this occasion:
yarn rw g scaffold post
Let's point the browser to http://localhost:8910/posts and see what we have:
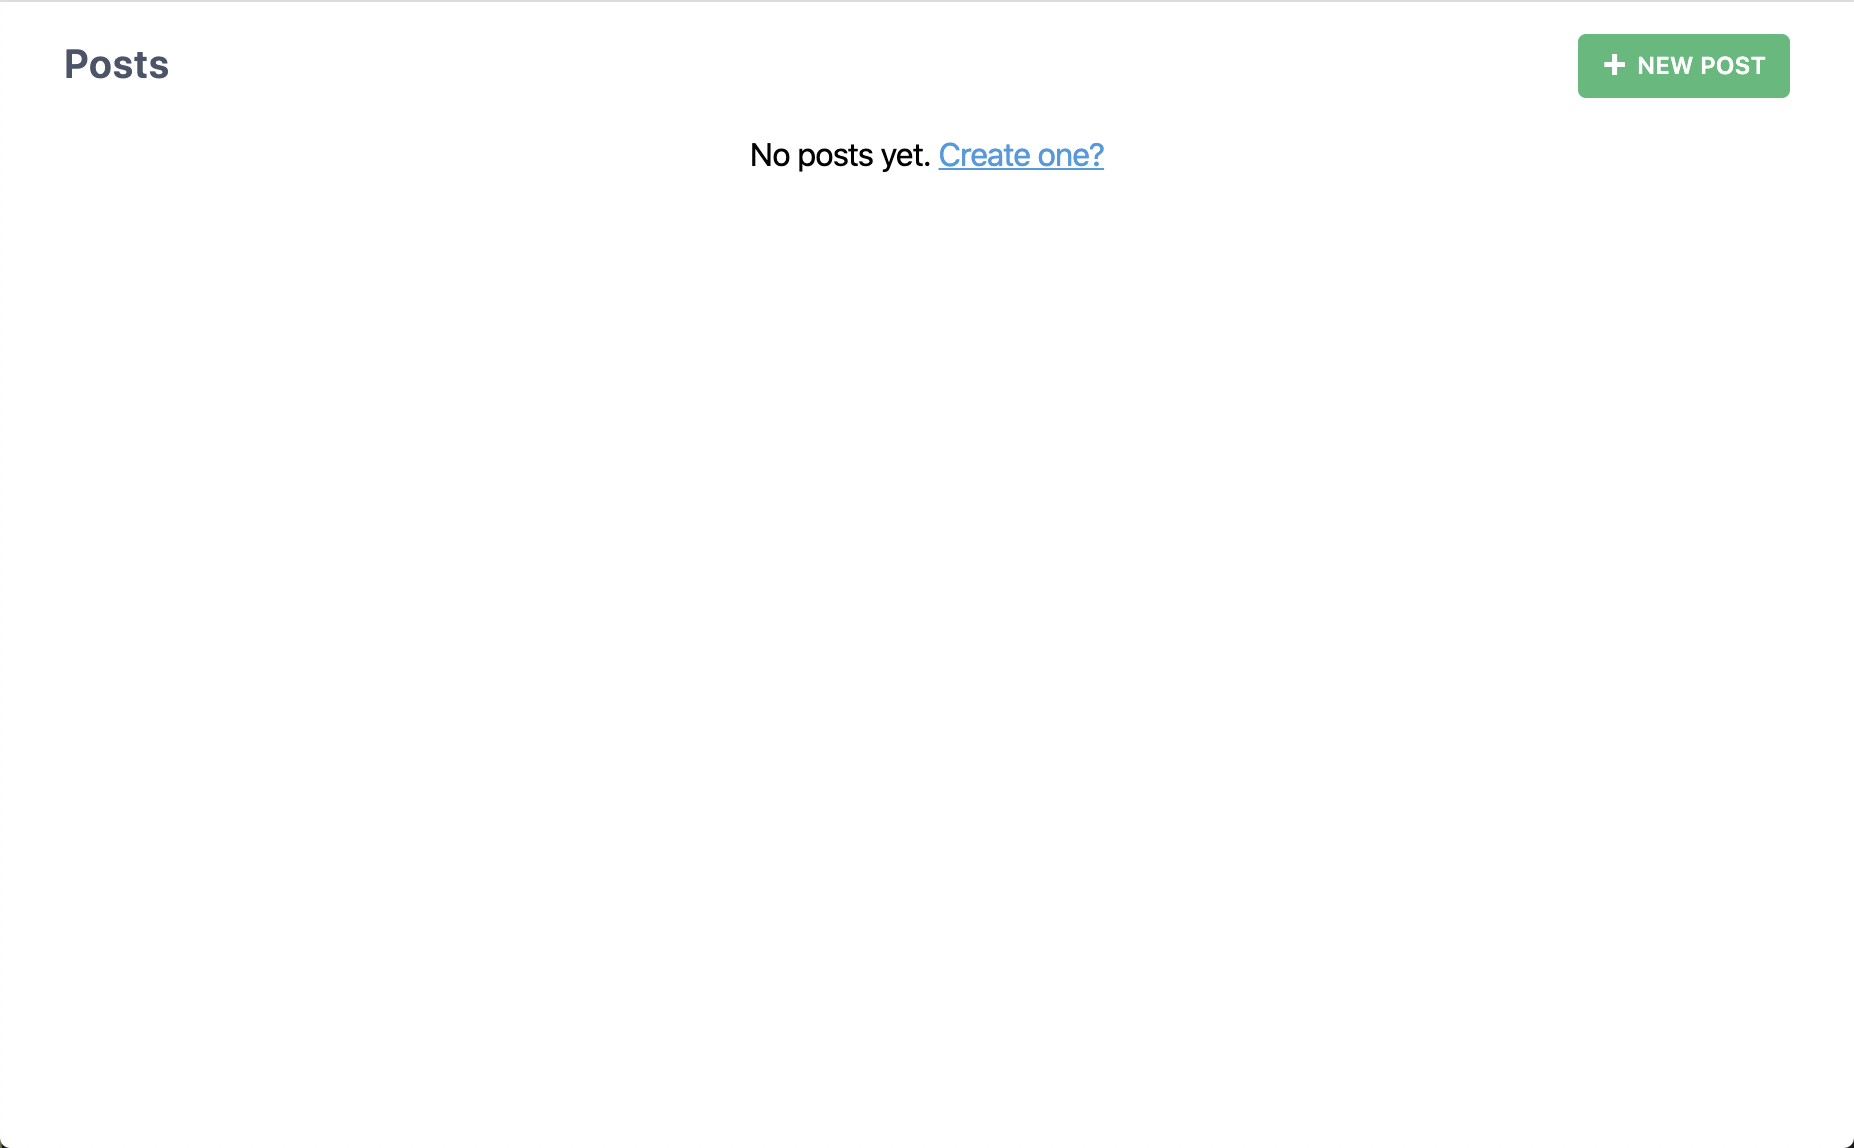
Well that's barely more than we got when we generated a page. What happens if we click that "New Post" button?
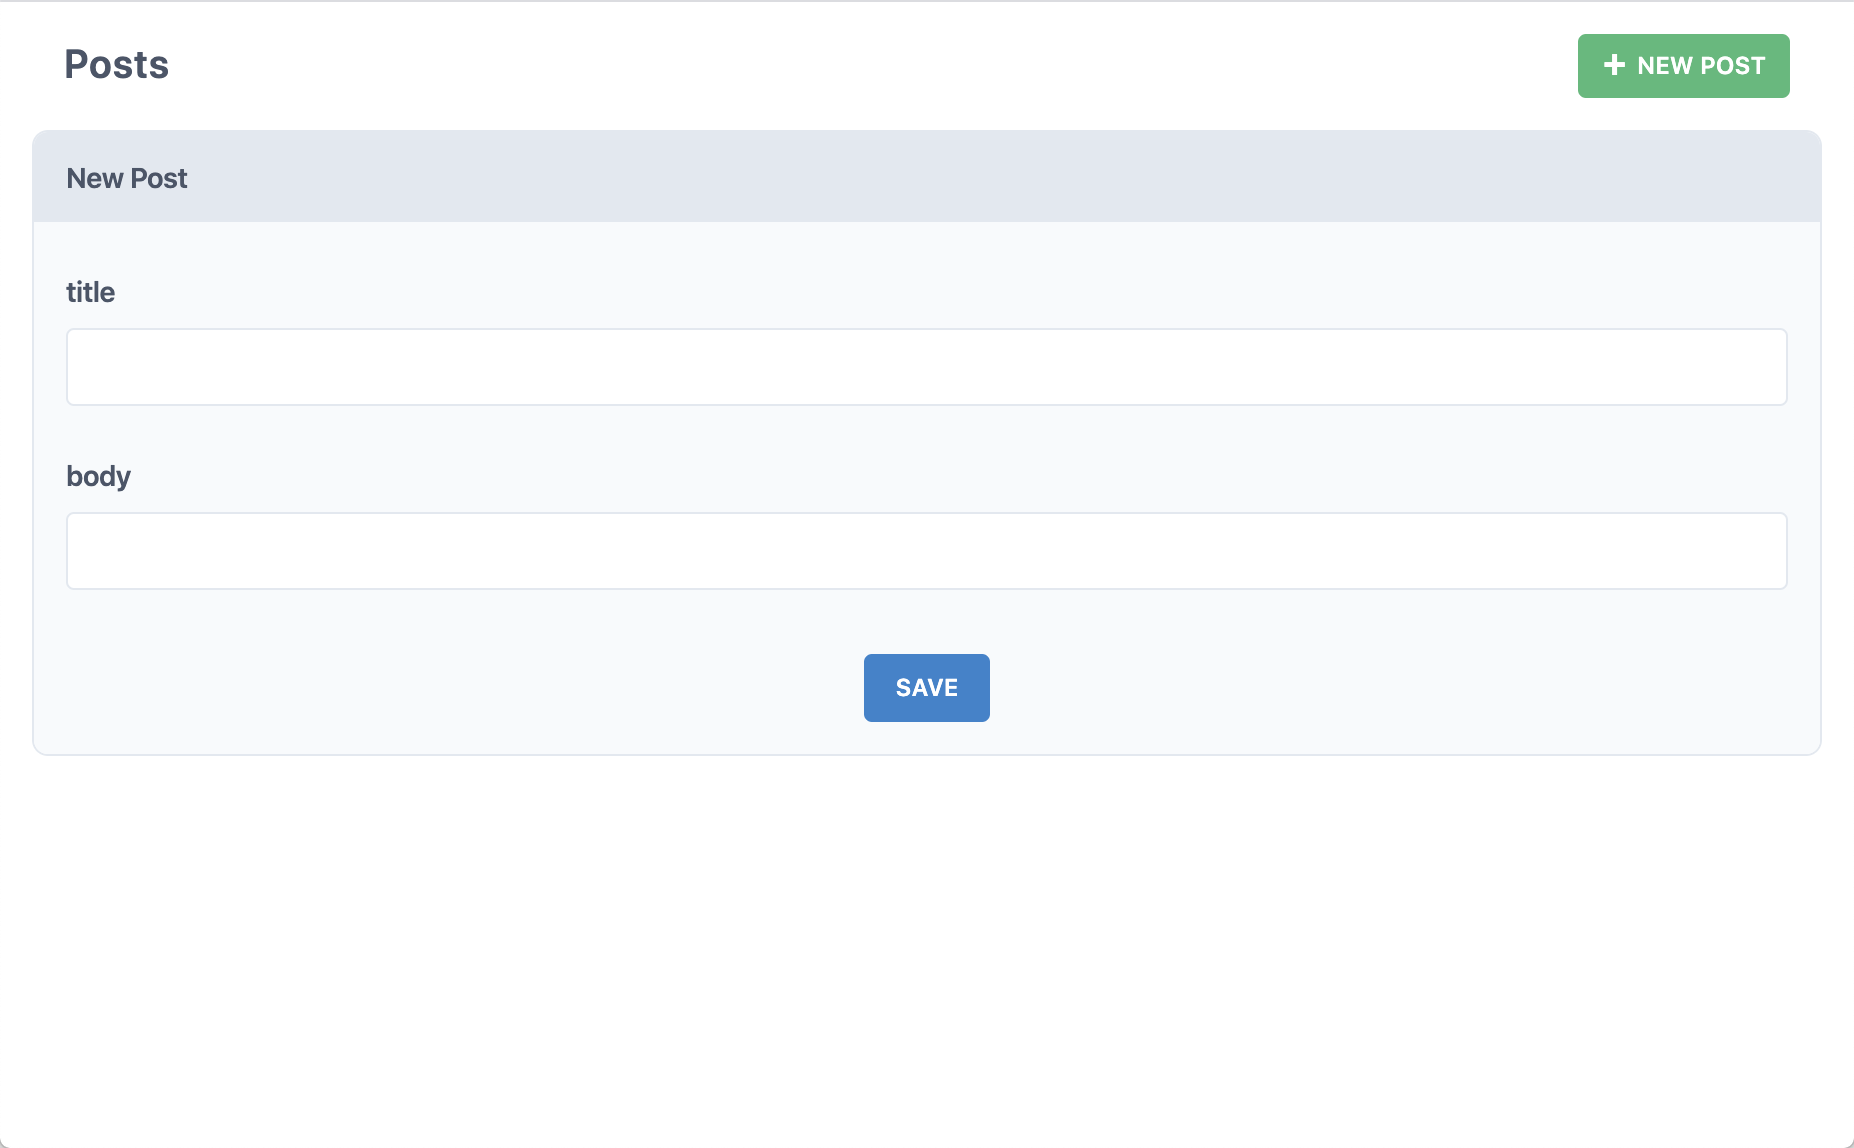
Okay, now we're getting somewhere. Fill in the title and body and click "Save".
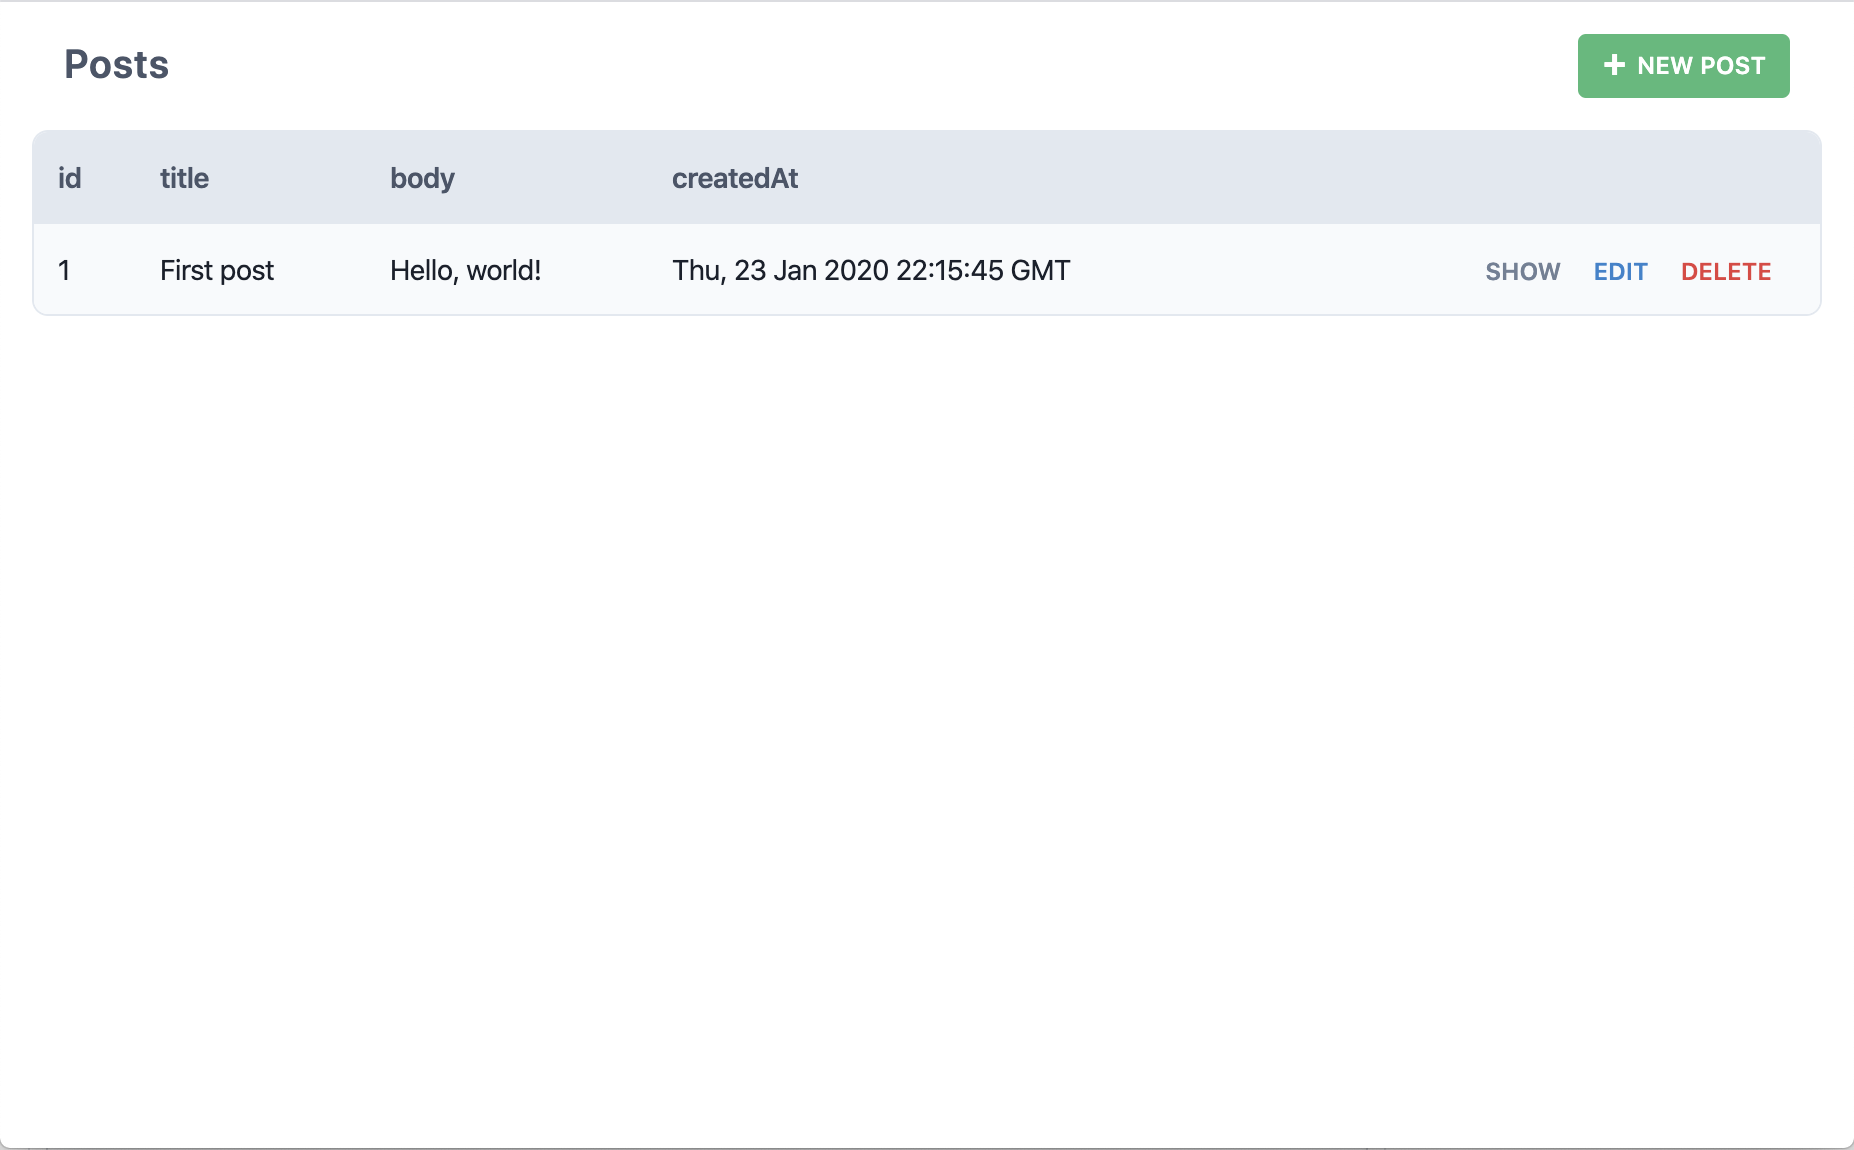
Did we just create a post in the database? And then show that post here on this page? Yup! Try creating another:
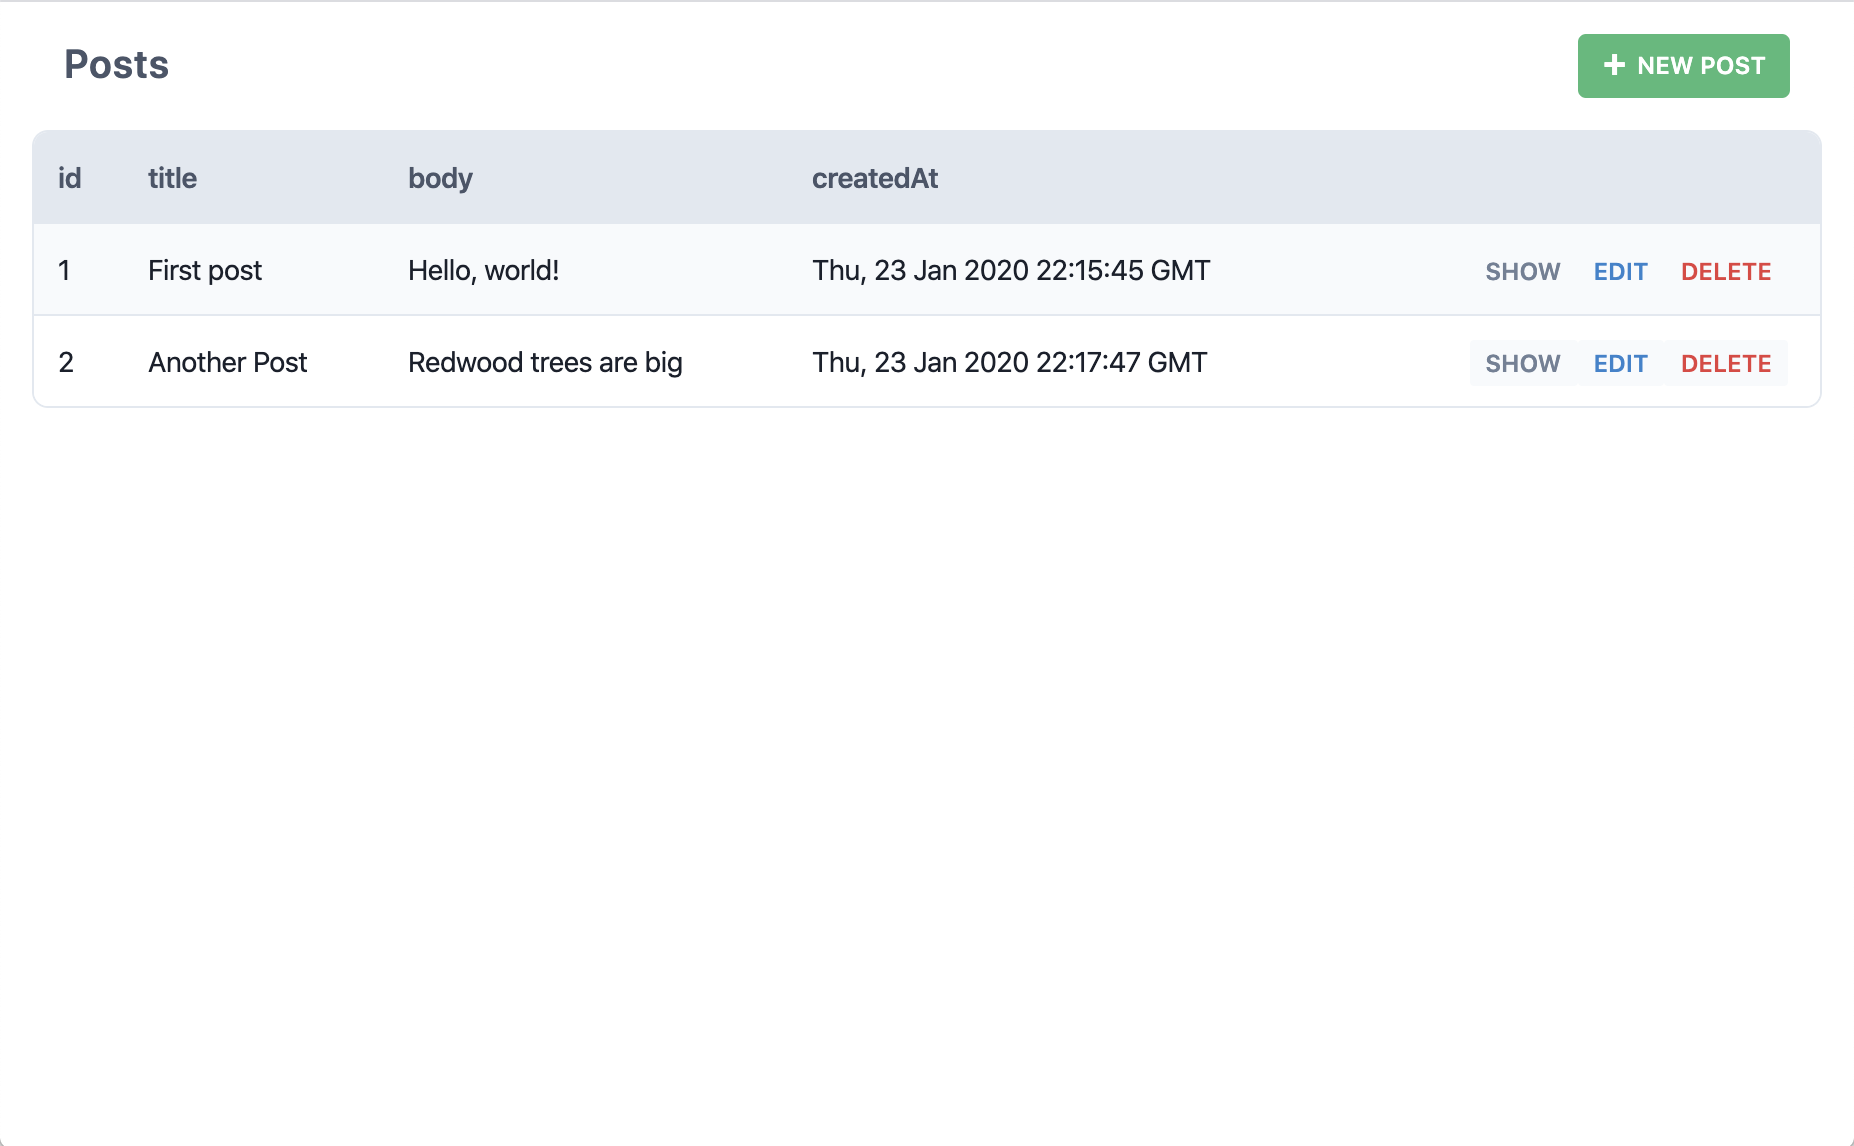
But what if we click "Edit" on one of those posts?
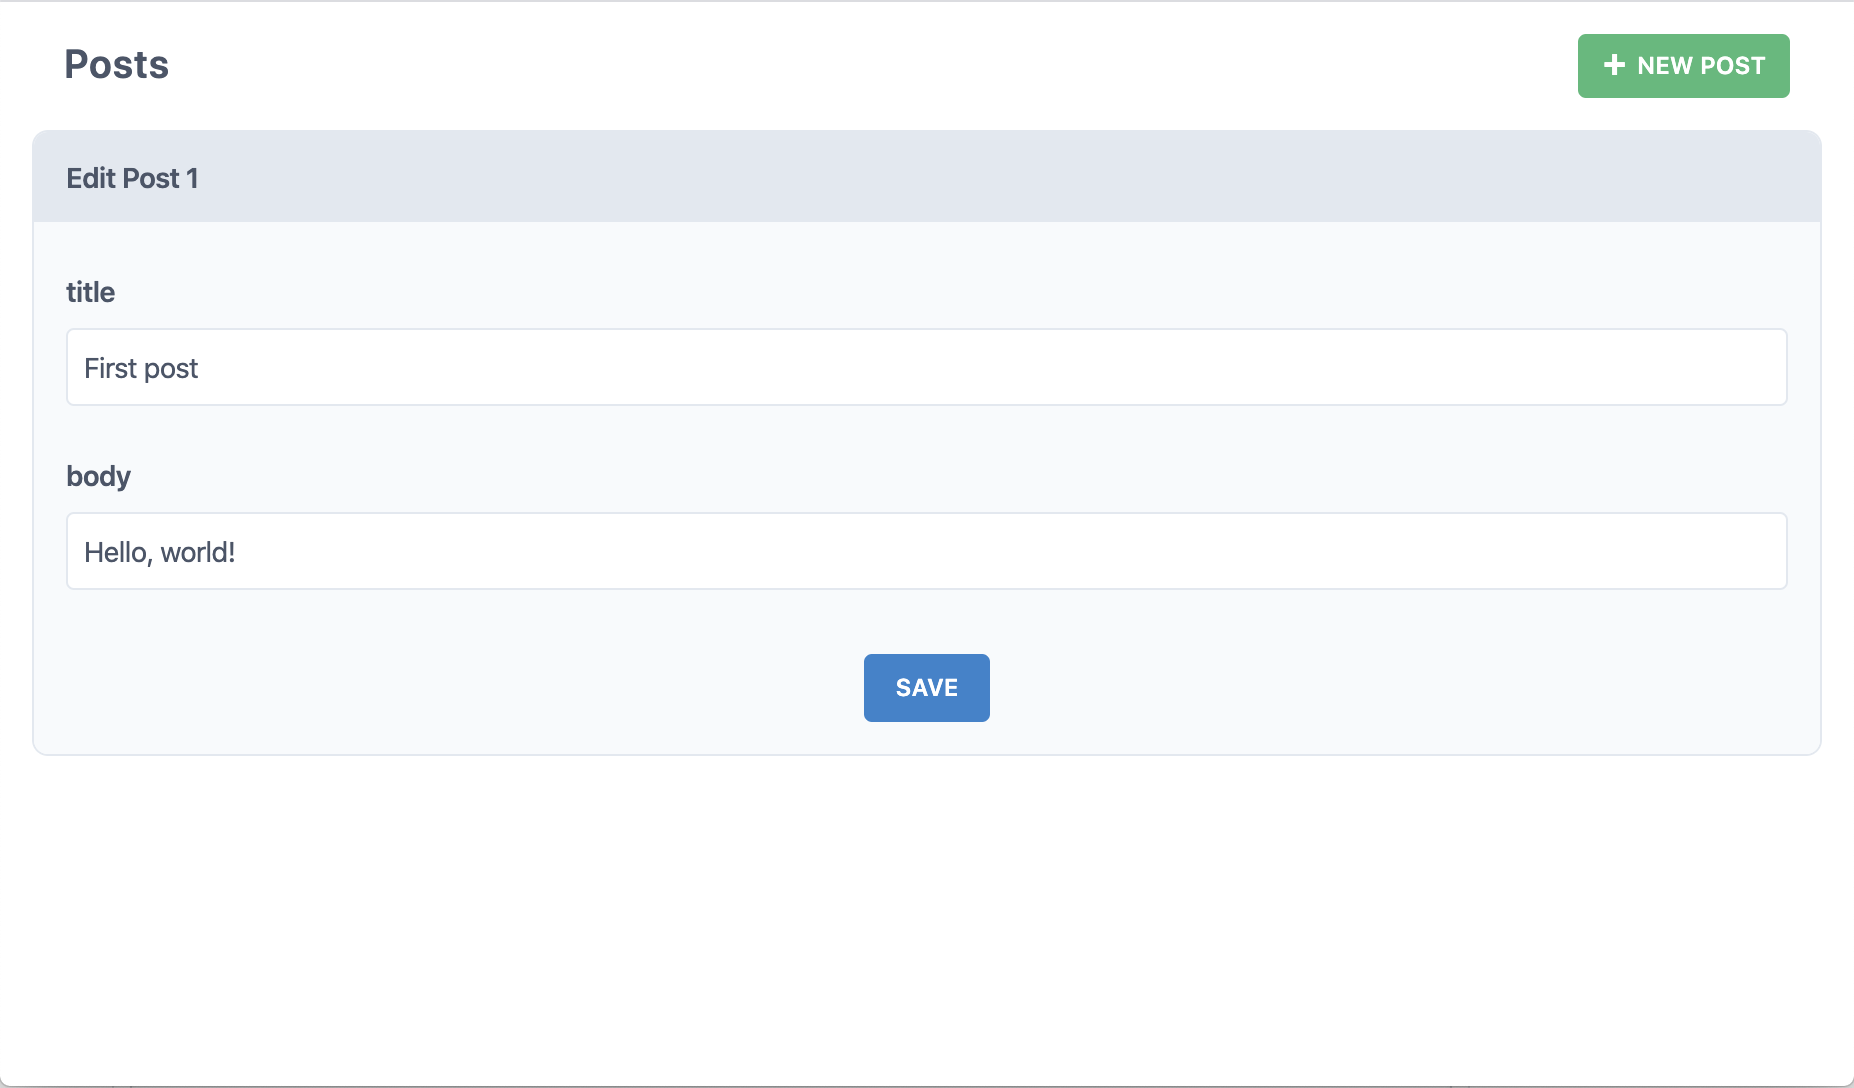
Okay but what if we click "Delete"?
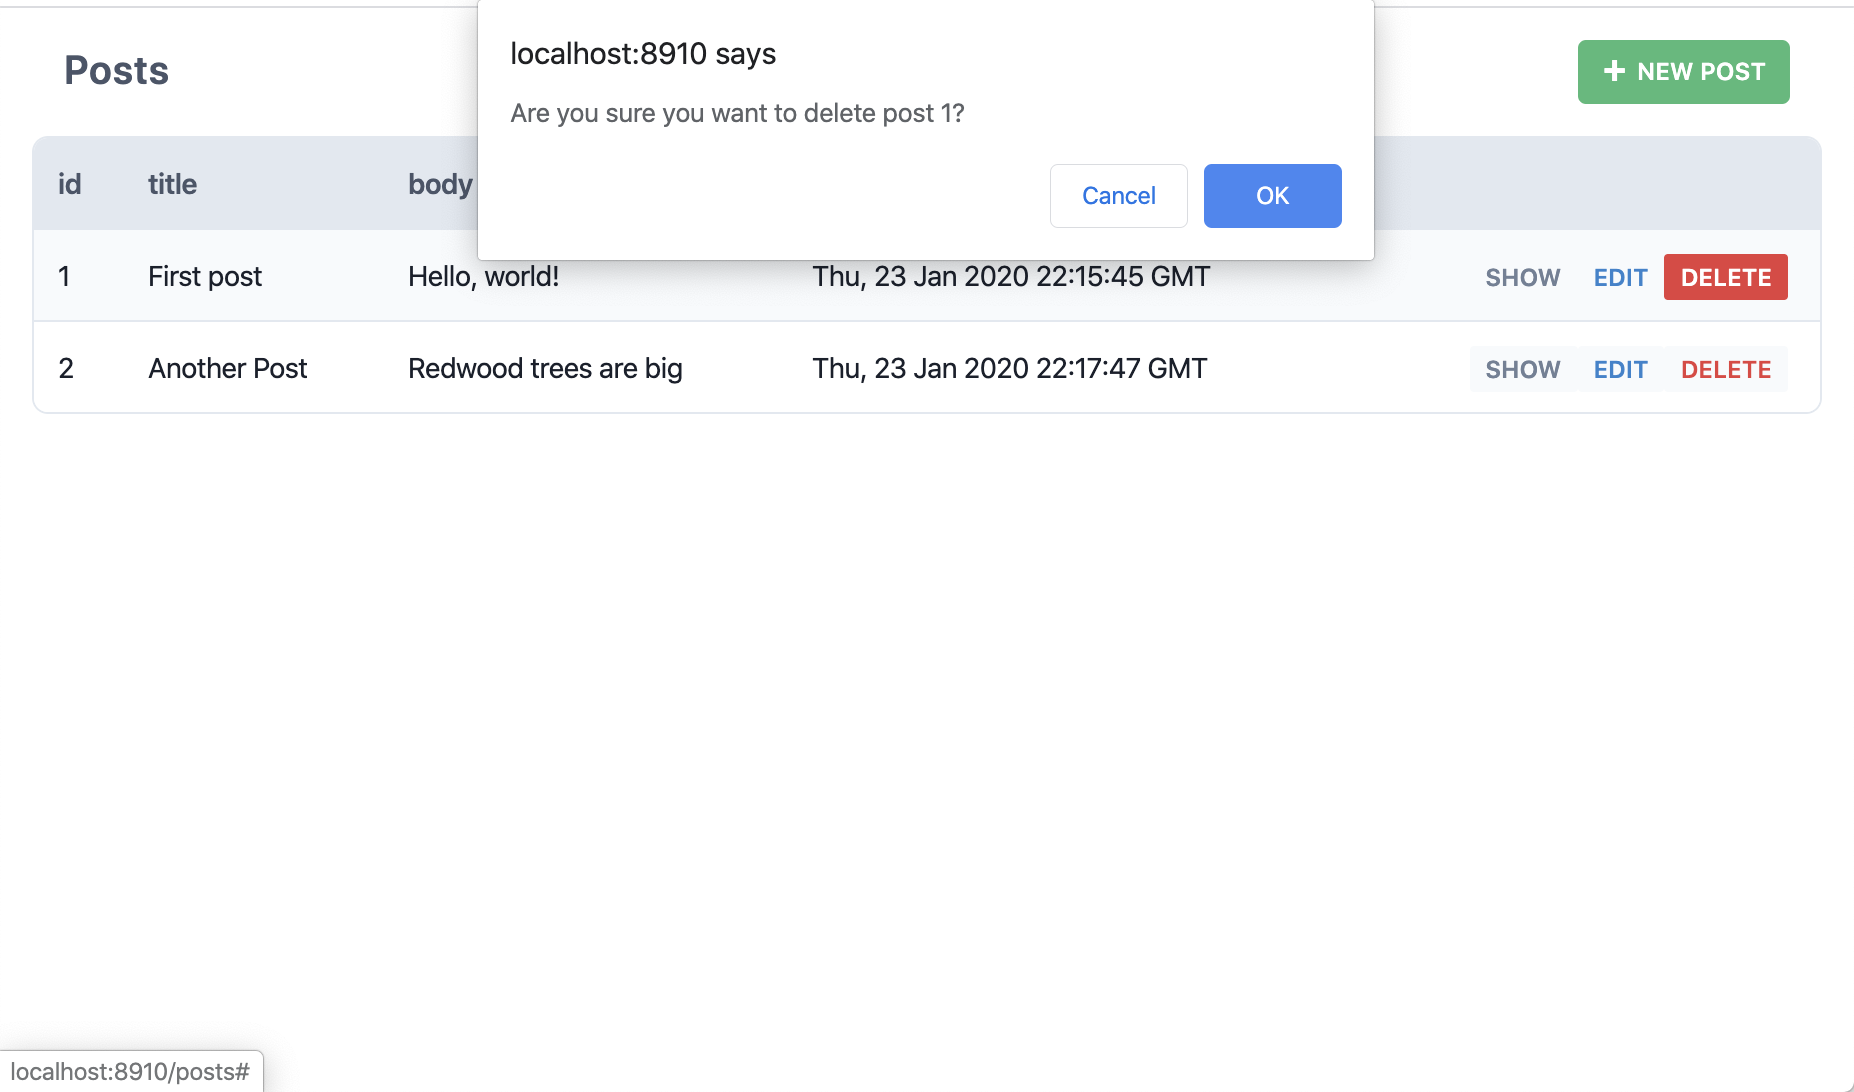
So, Redwood just created all the pages, components and services necessary to perform all CRUD actions on our posts table. No need to even open Prisma Studio or login through a terminal window and write SQL from scratch. Redwood calls these scaffolds.
If you head back to VSCode at some point and get a notice in one of the generated Post cells about Cannot query "posts" on type "Query" don't worry: we've seen this from time to time on some systems. There are two easy fixes:
- Run
yarn rw g typesin a terminal - Reload the GraphQL engine in VSCode: open the Command Palette (Cmd+Shift+P for Mac, Ctrl+Shift+P for Windows) and find "VSCode GraphQL: Manual Restart"
Here's what happened when we ran that yarn rw g scaffold post command:
- Created several pages in
web/src/pages/Post:EditPostPagefor editing a postNewPostPagefor creating a new postPostPagefor showing the detail of a postPostsPagefor listing all the posts
- Created a layout file in
web/src/layouts/ScaffoldLayout/ScaffoldLayout.tsxthat serves as a container for pages with common elements like page heading and "New Posts" button - Created routes wrapped in the
Setcomponent with the layout asPostsLayoutfor those pages inweb/src/Routes.tsx - Created three cells in
web/src/components/Post:EditPostCellgets the post to edit in the databasePostCellgets the post to displayPostsCellgets all the posts
- Created four components, also in
web/src/components/Post:NewPostdisplays the form for creating a new postPostdisplays a single postPostFormthe actual form used by both the New and Edit componentsPostsdisplays the table of all posts
- Added an SDL file to define several GraphQL queries and mutations in
api/src/graphql/posts.sdl.ts - Added a services file in
api/src/services/posts/posts.tsthat makes the Prisma client calls to get data in and out of the database
Pages and components/cells are nicely contained in Post directories to keep them organized while the layout is at the top level since there's only one of them.
Whew! That may seem like a lot of stuff but we wanted to follow best-practices and separate out common functionality into individual components, just like you'd do in a real app. Sure we could have crammed all of this functionality into a single component, but we wanted these scaffolds to set an example of good development habits: we have to practice what we preach!
You'll notice that some of the generated parts have plural names and some have singular. This convention is borrowed from Ruby on Rails which uses a more "human" naming convention: if you're dealing with multiple of something (like the list of all posts) it will be plural. If you're only dealing with a single something (like creating a new post) it will be singular. It sounds natural when speaking, too: "show me a list of all the posts" and "I'm going to create a new post."
As far as the generators are concerned:
- Services filenames are always plural.
- The methods in the services will be singular or plural depending on if they are expected to return multiple posts or a single post (
postsvs.createPost). - SDL filenames are plural.
- Pages that come with the scaffolds are plural or singular depending on whether they deal with many or one post. When using the
pagegenerator it will stick with whatever name you give on the command line. - Layouts use the name you give them on the command line.
- Components and cells, like pages, will be plural or singular depending on context when created by the scaffold generator, otherwise they'll use the given name on the command line.
- Route names for scaffolded pages are singular or plural, the same as the pages they're routing to, otherwise they are identical to the name of the page you generated.
Also note that it's the model name part that's singular or plural, not the whole word. So it's PostsCell and PostsPage, not PostCells or PostPages.
You don't have to follow this convention once you start creating your own parts but we recommend doing so. The Ruby on Rails community has come to love this nomenclature even though many people complained when first exposed to it!
Creating a Blog Homepage
We could start replacing these pages one by one as we settle on a look and feel for our blog, but do we need to? The public facing site won't let viewers create, edit or delete posts, so there's no reason to re-create the wheel or update these pages with a look and feel that matches the public facing site. Why don't we keep these as our admin pages and create new ones for the public facing site.
Let's think about what the general public can do and that will inform what pages we need to build:
- View a list of posts (without links to edit/delete)
- View a single post
Starting with #1, we already have a HomePage which would be a logical place to view the list of posts, so let's just add the posts to the existing page. We need to get the content from the database and we don't want the user to just see a blank screen in the meantime (depending on network conditions, server location, etc), so we'll want to show some kind of loading message or animation. And if there's an error retrieving the data we should handle that as well. And what about when we open source this blog engine and someone puts it live without any content in the database? It'd be nice if there was some kind of blank slate message until their first post is created.
Oh boy, our first page with data and we already have to worry about loading states, errors, and blank slates...or do we?